 Cakes
45 mins
Cakes
45 mins
Classic Vanilla Bean Victoria Sponge
A light, airy crumb with rich natural vanilla essence. Balanced butter-to-flour ratios yield a cake that is moist yet light enough for tea.
Welcome to Neet Recipe (published at neetrecipe.online). We are an independent food and cooking blog created to provide clear, reliable recipes, home baking instructions, and practical culinary ideas. From sourdough loaves and tender sponges to satisfying 30-minute pastas, our kitchen guides focus on genuine food science and accessible pantry ingredients.

No shortcuts, no exaggerated promises — just dependable culinary fundamentals.
Thoroughly tested dishes created for home cooks who appreciate genuine flavor, balanced moisture, and clear method steps.
Cakes
45 mins
A light, airy crumb with rich natural vanilla essence. Balanced butter-to-flour ratios yield a cake that is moist yet light enough for tea.
 Cookies
28 mins
Cookies
28 mins
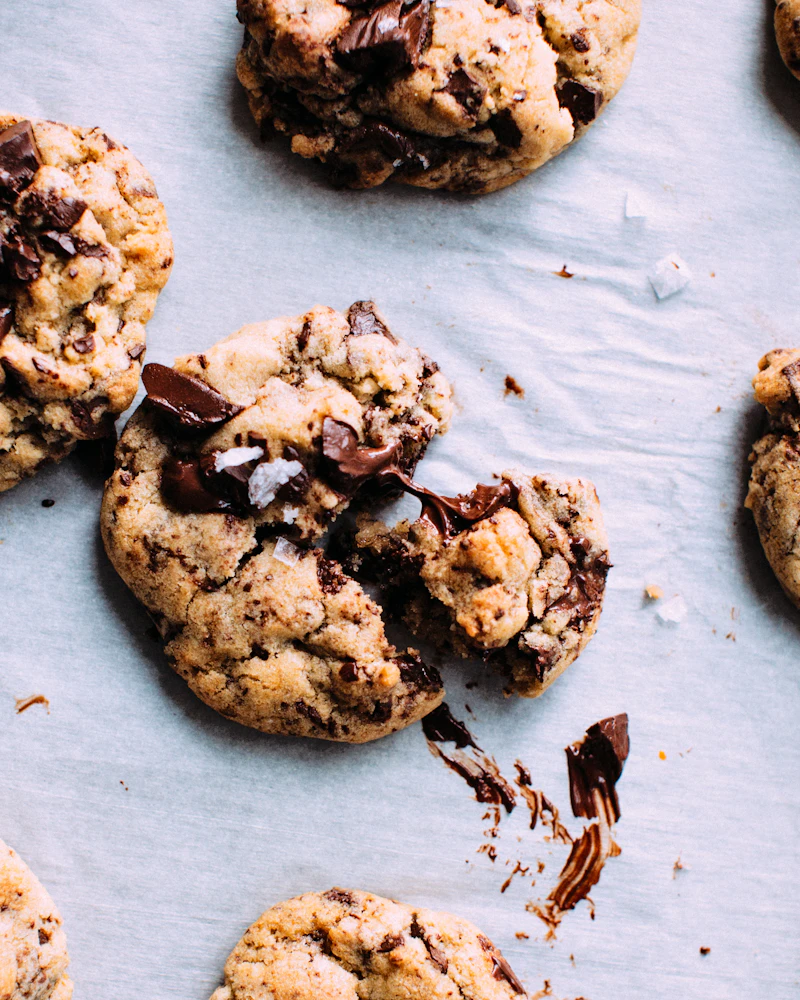
Crisp golden rims with soft, molten dark chocolate pockets in the center. Uses brown sugar moisture retention for lasting chewiness.
 Bread
40 mins bake
Bread
40 mins bake
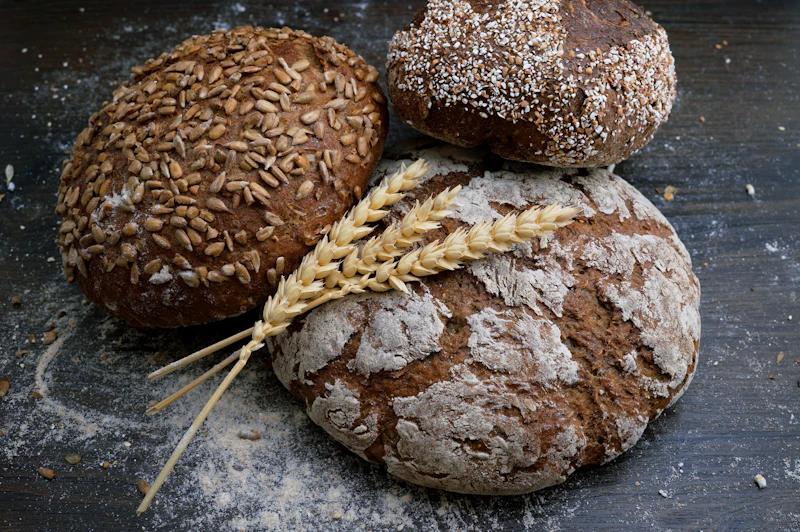
Shatteringly crisp blistered crust wrapping an open, airy crumb. Built on gentle fermentation and oven steam rather than hand labor.
 Dinner
30 mins
Dinner
30 mins
Al dente pasta tossed in a velvety cream sauce with sweet sun-dried tomatoes, wilted baby spinach, and freshly grated Parmigiano.
Browse our recipes categorized by kitchen discipline, baking category, and everyday meal planning.
Sponge cakes, tea loaves, layer cakes, bundt pans, and fruit-infused celebration bakes.
Chewy drop cookies, buttery shortbreads, snickerdoodles, and crisp afternoon biscotti.
Hand-laminated croissants, fruit danishes, puff pastry galettes, and choux buns.
Rustic sourdough, sandwich loaves, soft dinner rolls, focaccia, and skillet flatbreads.
Fruit tarts, silky custards, fruit crumbles, panna cottas, and chocolate mousses.
Golden buttermilk pancakes, baked egg skillets, wholesome oat bowls, and quick scones.
Warm pressed sandwiches, crisp grain salads, vegetable broths, and energizing wraps.
Hearty skillet meals, savory pastas, slow-roasted vegetables, and weeknight stews.
Oven calibration, flour aeration, creaming methods, hydration rates, and proofing cues.
Knife skills, sauce emulsification, layering seasoning, heat regulation, and pantry care.
High-satisfaction recipes that reader kitchens return to repeatedly for their dependable textures and balanced flavors.
 Breakfast
20 mins
Breakfast
20 mins
Pillowy and light with gentle tang. The reaction between buttermilk acidity and baking soda generates maximum lift without heavy batter.
 Pastries
2 hrs 45 mins
Pastries
2 hrs 45 mins
Detailed techniques on creating cold butter laminations, ensuring shatteringly crisp outer layers and an airy, honeycomb interior crumb.
 Desserts
1 hr 15 mins
Desserts
1 hr 15 mins
Crisp sweet pastry crust lined with rich vanilla-infused custard cream and crowned with fresh glazed raspberries and blueberries.
Neet Recipe (operating online at neetrecipe.online) is an independent food, recipe, and culinary education blog designed for home cooks, passionate bakers, and everyday kitchen explorers.
Our mission is rooted in practical clarity. Rather than chasing fleeting internet cooking trends or relying on hard-to-find ingredients, we document reliable methods for building foundational cooking and baking competence. We explore how pantry staples like flour, butter, eggs, olive oil, and herbs behave under heat and time, giving home cooks the confidence to replicate results in their own home ovens and stovetops.
Each guide on neetrecipe.online is structured for effortless home use: providing dual metric and imperial measurements, active preparation times, total baking durations, sensory indicators, and storage recommendations so that fresh food is never wasted.
Comprehensive cooking documents featuring full ingredient breakdowns, checkable prep lists, and precise chef guidance.
The quintessential British afternoon tea cake. When butter and sugar are creamed adequately to aerate the batter, this formula yields two golden sponges with a velvety crumb that holds jam and cream without soaking or flattening.
Position your oven rack in the center. Preheat oven to 180°C (350°F) standard or 160°C convection. Grease two 20cm (8-inch) round sandwich cake tins and line the bottom circles with parchment paper.
In a large mixing bowl, beat softened butter and caster sugar together with an electric hand mixer for 4 to 5 minutes until noticeably pale, light, and creamy.
Beat the eggs lightly in a small cup. Pour into the creamed mixture in 3 gradual additions, beating vigorously after each addition to prevent curdling. Blend in the vanilla extract and salt.
Sift in the self-rising flour. Using a wide rubber spatula or metal spoon, fold gently in a figure-eight motion until just combined. Fold in the 2 tablespoons of milk to achieve a silky dropping consistency.
Divide batter evenly between tins and smooth the tops. Bake for 22 to 25 minutes until golden brown and the tops spring back when gently pressed. Rest in tins for 5 minutes, then cool completely on a wire rack.
Place one cake sponge inverted on a serving stand. Spread with raspberry conserve and whipped cream. Place the second sponge upright on top, and dust with powdered sugar.
Temperature Parity: Never add chilled eggs to creamed butter; cold liquid causes fat emulsion breakage. Storage: Without fresh dairy cream, store the cake in an airtight tin at room temperature for up to 3 days. With fresh dairy cream, refrigerate and consume within 24 hours.
A precise sugar ratio (higher brown sugar than white) paired with melted butter produces a decadent cookie with caramelized outer edges and a chewy, dense center filled with molten chocolate.
In a mixing bowl, whisk together the melted butter, packed brown sugar, and granulated sugar for about 90 seconds until glossy and smooth.
Add the egg and vanilla extract. Whisk vigorously until the mixture thickens slightly and lightens to a light caramel tone.
In a small bowl, whisk flour, baking soda, and salt. Fold into the butter-sugar mixture with a spatula just until dry streaks vanish.
Fold in chocolate chips. For thicker cookies with deeper flavor, chill dough in the refrigerator for 30 minutes.
Preheat oven to 175°C (350°F). Scoop 2-tablespoon dough mounds onto lined baking sheets, spacing 5cm (2 inches) apart. Bake for 10 to 12 minutes until edges are golden and centers remain soft.
Allow cookies to sit on the warm tray for 5 minutes before transferring to a wire rack. Sprinkle with flaky salt if desired.
Fresh Storage: Store in an airtight container with a slice of sandwich bread for up to 5 days. The cookies absorb humidity from the bread, remaining soft. Freezing Dough: Freeze portioned dough balls on a sheet pan, then bag for up to 2 months; bake from frozen adding 2 extra minutes.
High hydration dough combined with the intense radiant heat of a covered cast iron Dutch oven creates bakery-quality crust blister and crumb expansion with zero manual kneading.
In a large glass or ceramic bowl, whisk bread flour, instant yeast, and salt. Pour in lukewarm water and stir with a sturdy wooden spoon until all dry flour is absorbed into a wet, shaggy mass.
Drizzle olive oil around bowl edges. Cover tightly with a clean damp kitchen towel and let rest at room temperature (21-24°C) for 2 to 2.5 hours until doubled in volume and spongy with surface bubbles.
Turn sticky dough onto a floured surface. Fold outer edges into the center from 4 sides to create surface tension, then roll over into a round boule. Transfer onto parchment paper.
Place a heavy 4 to 6-quart cast iron Dutch oven with its lid into the oven. Preheat to 230°C for at least 30 minutes so the pot absorbs maximum radiant heat.
Dust dough with flour and score a 1cm slash across the top. Carefully transfer dough into the screaming hot Dutch oven using parchment handles. Cover with lid and bake for 30 minutes.
Remove lid, lower temperature to 215°C (420°F), and bake uncovered for 10 to 12 minutes until deeply browned. Cool on a wire rack for at least 60 minutes before slicing.
Never Plastic Wrap: Sealing crusty artisan loaves in plastic bags traps migrating steam and turns the crust rubbery. Keep loaves cut-side down on a wooden breadboard or inside a paper bag. Re-crisp whole loaf in a 190°C oven for 6 minutes.
A restaurant-quality 30-minute weeknight dinner that harmonizes aromatic minced garlic, tangy oil-cured sun-dried tomatoes, tender baby spinach, and aged Parmigiano-Reggiano cream.
Bring a large pot of salted water to boil. Add penne and boil for 9 to 11 minutes until al dente. Reserve ½ cup of starchy pasta water before draining.
In a large deep skillet, heat olive oil over medium-low heat. Add minced garlic, sun-dried tomatoes, oregano, and chili flakes. Sauté gently for 90 seconds until fragrant without browning the garlic.
Pour in chicken broth and heavy cream. Bring to a gentle simmer for 3 to 4 minutes, stirring continuously until the sauce begins to reduce slightly.
Add fresh baby spinach leaves in batches until wilted into sauce (about 2 minutes). Remove from direct heat and stir in grated Parmesan until smooth and velvety.
Add drained hot pasta into the sauce skillet. Toss to coat thoroughly. If sauce is too thick, splash in 2 to 3 tablespoons of reserved starchy cooking water to achieve glossy cling.
Season with freshly cracked black pepper and a touch of sea salt. Serve immediately garnished with extra grated Parmesan cheese.
Avoid Harsh Microwaves: High microwave heat breaks emulsion and releases greasy oil. Reheat pasta slowly in a saucepan over low flame with a tablespoon of fresh milk or broth, stirring until creamy.
Professional kitchen principles that improve consistency, flavor depth, and texture outcomes in everyday home cooking.
Domestic ovens routinely drift by 15°C to 25°C from their digital dials. Hanging an inexpensive stainless steel oven thermometer from your middle rack eliminates guesswork, ensuring even cake rise and perfect cookie caramelization.
Scooping measuring cups directly into dense flour sacks packs grains tightly, easily adding up to 25% extra weight. Always aerate flour with a fork, spoon it lightly into the cup, and sweep flat with a butter knife for tender bakes.
When cake recipes specify room temperature butter, eggs, and milk, let them rest on the counter for 45 to 60 minutes beforehand. Room temperature dairy forms a smooth emulsion that traps microscopic air pockets, producing high-rising, soft cakes.
Adding pinches of salt throughout each stage of preparation (sweating aromatics, browning proteins, finishing sauces) draws out interior cell juices and creates harmonious, rounded flavors superior to salting only at the dining table.
Allowing mixed flour and water to sit undisturbed for 20 to 30 minutes before incorporating salt or yeast activates natural grain enzymes, developing gluten strength effortlessly without demanding strenuous manual kneading.
A dull knife slips off slippery onion skins, slick tomato skins, and hard squash rinds, creating an extreme laceration hazard. A sharp knife bites predictably into food, giving you full control and preserving delicate cell walls.
Have a recipe question, culinary technique inquiry, or general feedback about neetrecipe.online? Reach out to our editorial desk below.
At Neet Recipe (accessible at https://neetrecipe.online/), we prioritize the privacy and data rights of our visitors. This Privacy Policy outlines the categories of voluntary and automated technical information that may be gathered when you browse our website and details how that information is handled.
Visitors may voluntarily communicate with us by entering contact information (such as their name and email address) within our website contact form or via electronic mail. Any such voluntarily submitted details are used solely to reply to your specific inquiry or culinary question. We do not sell, rent, monetize, or trade voluntarily submitted personal contact details with commercial third parties.
Like standard web publishing infrastructure, neetrecipe.online uses standard server log files. The data logged automatically may include internet protocol (IP) addresses, browser type, internet service provider (ISP), date/time stamps, referring/exit pages, and click statistics. This technical data is non-personally identifiable and is analyzed exclusively to maintain server health, detect security irregularities, and understand overall aggregate traffic patterns.
neetrecipe.online may utilize standard HTTP cookies to store visitor preferences, record session interactions, and optimize web page display based on browser specifications. For comprehensive specifics regarding cookie categories, please review our separate Cookie Policy section below.
We may employ privacy-focused third-party analytics services to evaluate general readership numbers, popular recipe guides, and device resolutions. These analytics systems aggregate metrics anonymously without building individual user behavioral dossiers.
Third-party advertising partners and networks may display commercial announcements on neetrecipe.online. When these third-party ads appear, the ad network's servers automatically receive your IP address and may employ tracking technologies (such as cookies, JavaScript, or web beacons) to gauge the effectiveness of their campaigns and serve contextual advertising. neetrecipe.online does not control and does not have access to cookies managed by external advertising vendors.
Depending on your regional privacy jurisdiction (such as the European Economic Area under GDPR or California under CCPA), you may have the option to receive non-personalized advertisements. Non-personalized ads rely strictly on contextual relevance (such as the theme of the recipe page you are currently viewing) rather than past multi-site browsing history.
We implement standard technological protections, including SSL/TLS HTTPS encryption, to prevent unauthorized interception of data transmitted across our website. However, no electronic transmission or digital storage platform can guarantee absolute security.
Our recipe articles and resources may link to third-party culinary references, equipment manufacturers, or food documentation sites. We have no authority over external websites and accept no liability for their content, policies, or data handling practices.
Safeguarding youth online is of critical importance. neetrecipe.online does not knowingly solicit or collect personal information from children under the age of 13. If you believe your minor child has submitted identifiable personal details through our site, please contact us immediately so we can promptly delete such records.
Depending on your location, you may possess legal rights to request access to, modification of, or deletion of your personal records. You may also configure your personal web browser settings to block or delete cookies at any time.
We reserve the right to revise this Privacy Policy periodically to reflect site adjustments or regulatory developments. Modifications become effective immediately upon being published on this page.
For questions or formal data requests concerning our Privacy Policy, please email our administrative team at: contact@neetrecipe.online.
This Cookie Policy explains what cookies are, how neetrecipe.online utilizes cookies and related tracking mechanisms, and the controls available to you as a visitor.
Cookies are small text strings saved to your computer, tablet, or smartphone by websites you visit. They are universally employed to make web properties operate reliably, recall user preferences, and provide analytical data to website publishers.
Essential cookies are necessary for fundamental website navigation, load balancing, and network defense. Without these cookies, basic page delivery cannot function reliably. They cannot be turned off through site preference menus.
Performance cookies collect anonymous data regarding visitor usage, such as which recipe pages are viewed most frequently and whether error responses occur. These cookies do not collect identifiable personal information; all collected data is aggregated to enhance layout and navigation.
External advertising networks may place cookies through our website to deliver commercial messages appropriate to your device or geographic zone. These cookies function by identifying your unique browser instance rather than storing personal details like your legal name or home address.
Certain third-party embeds (such as video media players or analytics scripts) may issue cookies governed by the respective third party's independent privacy guidelines.
You have the right to accept or decline cookies. Most desktop and mobile web browsers allow you to modify cookie controls through their settings menus:
Note that disabling certain cookie categories may slightly impact website formatting or page load speed.
Cooking and baking outcomes depend heavily upon variables beyond our control, including appliance heat calibration, atmospheric humidity, local elevation, raw ingredient variations, egg weights, pan materials, and personal technique. Neet Recipe makes no guarantees that individual cooking outcomes will identical to the descriptions or photos presented on our pages.
Home cooks must exercise careful individual judgment before preparing and consuming food. Many recipes on this site contain common food allergens, including dairy, wheat gluten, eggs, and tree nuts. Readers are solely responsible for:
Neet Recipe does not provide medical, certified dietitian, or clinical nutritional advice. Content on neetrecipe.online must never be substituted for professional medical consultation or individualized dietary planning.
Any calorie counts, macronutrient estimates, or nutritional summaries that may be included are purely approximate calculations based on standard ingredient databases. Because specific retail brands and portion trimming differ widely, readers with medical dietary constraints should calculate nutritional values using their exact packaged ingredients.
Under no circumstances shall neetrecipe.online, its writers, or its publishers be held responsible or liable for any adverse reactions, allergic occurrences, foodborne illnesses, kitchen accidents, or unsatisfactory recipe results resulting directly or indirectly from the use of information on this site.
Welcome to neetrecipe.online. By browsing and using this website, you agree to comply with and be bound by the following Terms and Conditions. If you disagree with any portion of these terms, you should discontinue use of the site immediately.
The content published on neetrecipe.online is provided exclusively for your personal, non-commercial enjoyment and informational use. You agree not to engage in malicious conduct, transmit harmful digital code, or attempt unauthorized penetration of our server infrastructure.
All original written recipes, instructional step-by-step guides, descriptive copy, and site design arrangements are the protected intellectual property of neetrecipe.online. You may print individual recipes for private home cooking. Systematic republication, electronic scraping, redistribution, or commercial reproduction of whole articles without prior written permission is prohibited.
When submitting messages via our contact facility, you agree to submit truthful information and avoid abusive, defamatory, or unlawful communications.
Our website may link to third-party websites for reference. These external links do not signify endorsement of those third-party platforms. We bear no liability for the content, privacy practices, or availability of external web resources.
neetrecipe.online is provided on an "as is" and "as available" basis without express or implied warranties of any kind. To the maximum extent permitted under applicable law, we disclaim liability for any direct, indirect, incidental, or consequential damages resulting from website use.
We reserve the right to revise these Terms and Conditions at our sole discretion. Your continued use of neetrecipe.online after amendments are published constitutes acceptance of the modified terms.
Editorial integrity and reader trust are paramount at neetrecipe.online.
Currently, neetrecipe.online does not feature paid commercial affiliate links or sponsored product endorsements in our recipe guides. Equipment and ingredient mentions (such as stainless-steel oven thermometers, heavy cast-iron Dutch ovens, or unbleached bread flour) are based entirely on home baking technique and kitchen practicality.
If our editorial staff introduces affiliate relationships in the future (wherein the website might earn a modest commission on qualifying purchases at no added cost to readers), every qualifying link will be accompanied by clear, transparent disclosures adjacent to the link or at the beginning of the respective article. We will never recommend cookware or ingredients that we do not believe provide genuine utility to home cooks.
To maintain, host, and continuously operate neetrecipe.online as a free culinary resource for home cooks, this website may display commercial advertisements provided by third-party advertising networks.
These external advertising partners may display contextual promotions across various sections of the website. Paid promotional units are kept distinct from our editorial recipe writing. The appearance of an advertisement on neetrecipe.online does not constitute an official endorsement, warranty, or recommendation of the featured product or service by our editorial team.
We strictly prohibit deceptive advertising practices, including ad units designed to mimic site navigation, fake system warnings, forced redirects, or misleading download buttons. When you click an external advertisement, you leave neetrecipe.online and become subject to the distinct terms and privacy practices of that sponsor's platform.
For more details regarding cookies used in ad serving, please review our Privacy Policy and Cookie Policy sections.